🤳 How to check-in attendees
Tixtree provides three convenient methods for checking in your attendees:
Offline via list
If you’re hosting a small event with fewer than 100 attendees, checking in offline can be a practical solution, especially if you prefer using a tablet over printed paper (you know, we are all about sustainability and we are on a mission).
Tixtree gives you the option to download your attendees data any time, in PDF or CSV format, let's see how.
Step 1
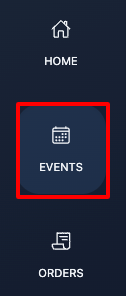
Click "Events" from the main menu.
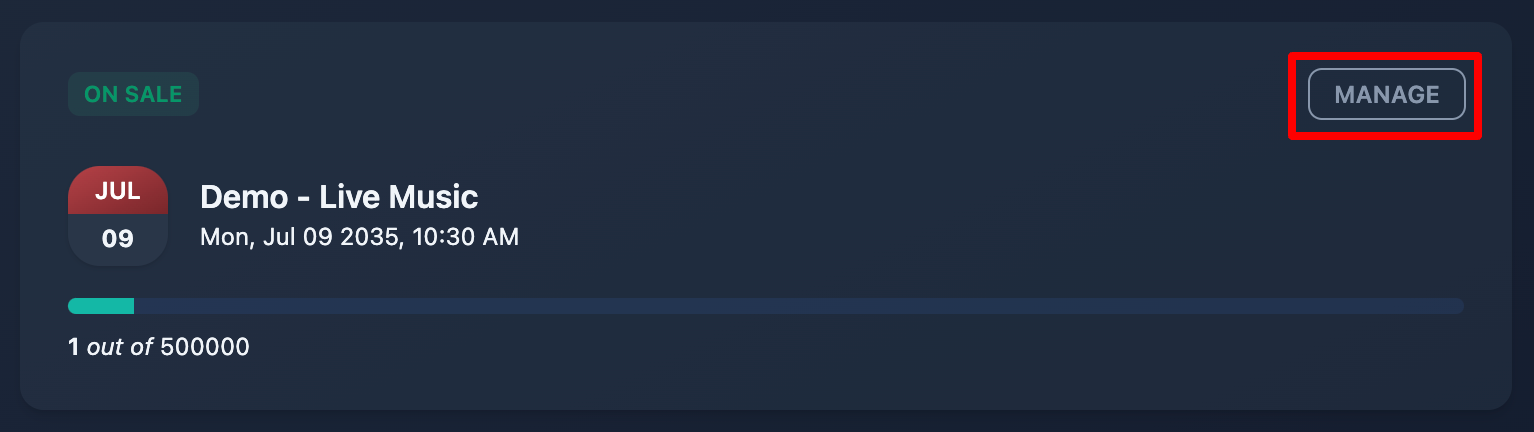
Step 2
Find your event and click "Manage".
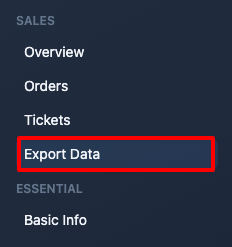
Step 3
Click "Export Data" from your event sidebar.
Step 4
Download your list(s) in your preferred format.
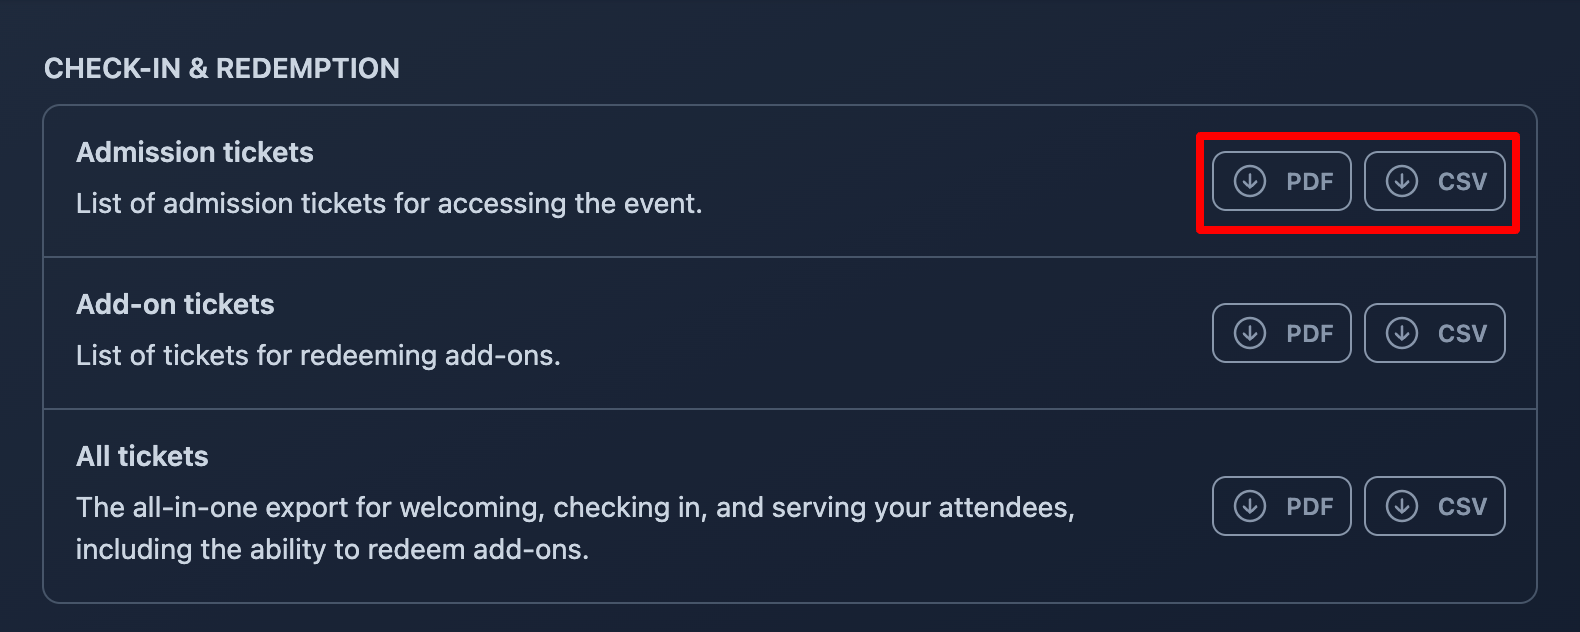
You can download all issued tickets at once (including both admission and add-on tickets) or as two separate lists if you prefer to manage check-in and add-on redemption separately.
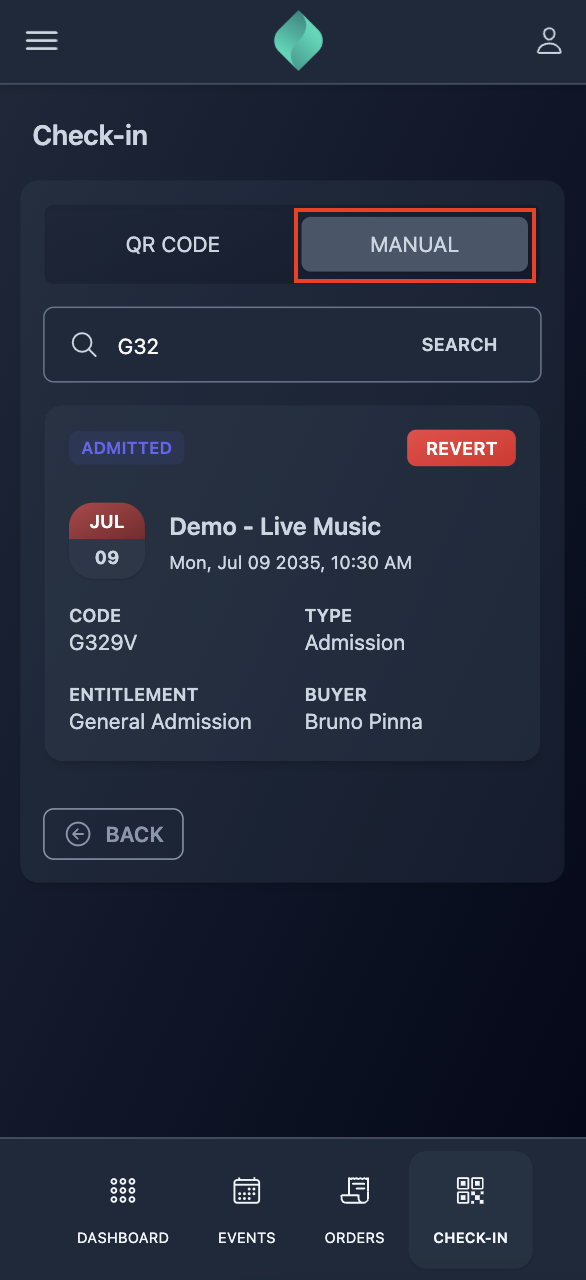
Manual check-in
Imagine this: you’re hosting a conference and already at your laptop, printing attendee badges as they check in. In this scenario, it makes perfect sense to avoid adding another device, like a smartphone, to your setup. That’s why we designed the manual check-in feature, specifically for situations like yours.
Step 1
Click "events" from the main menu.
Step 2
Find your event and click "manage".
Step 3
Click "Tickets" from your event sidebar.
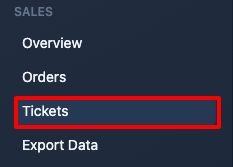
Step 4
Find your attendee's ticket.

You can search by ticket code, buyer name, email, or even by responses to any order questions.
Step 5
Click "check-in".
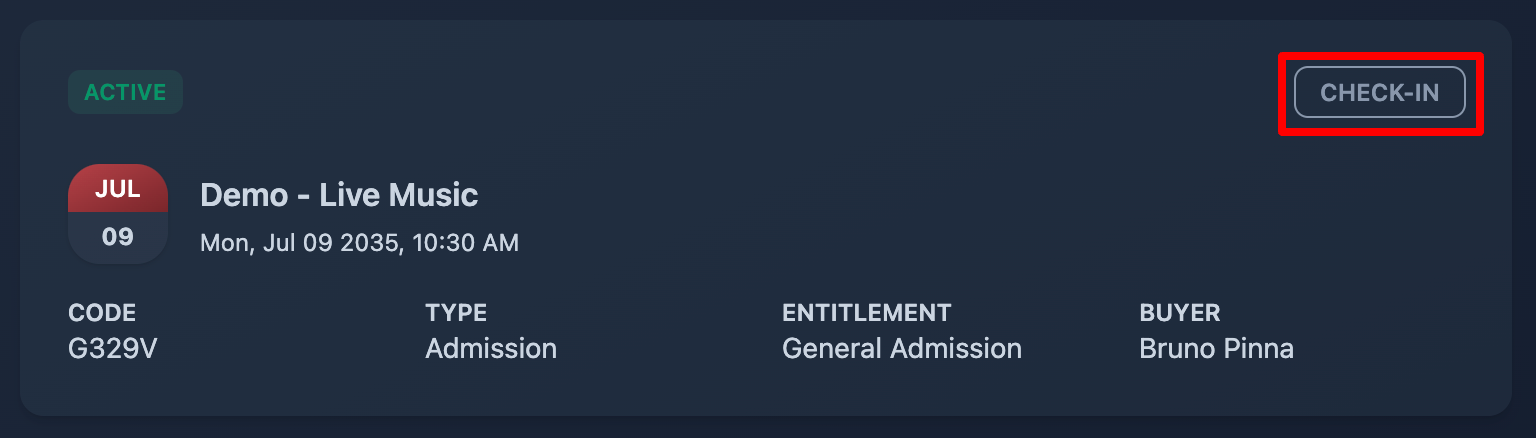
Bonus: revert check-in
If something goes wrong (like an attendee forgetting their smartphone in the car and being unable to update their followers on X during the conference) you can easily revert the check-in and then check them in again when they are back to your desk.

QR code scanner
We highly recommend using our QR code scanner for check-ins, as it's the most efficient way to avoid the long queues we all dread when we're on the other side of the desk.
Our QR codes can be easily scanned from any mobile device, such as tablets or smartphones.
Step 1
Click "check-in" from the main menu.
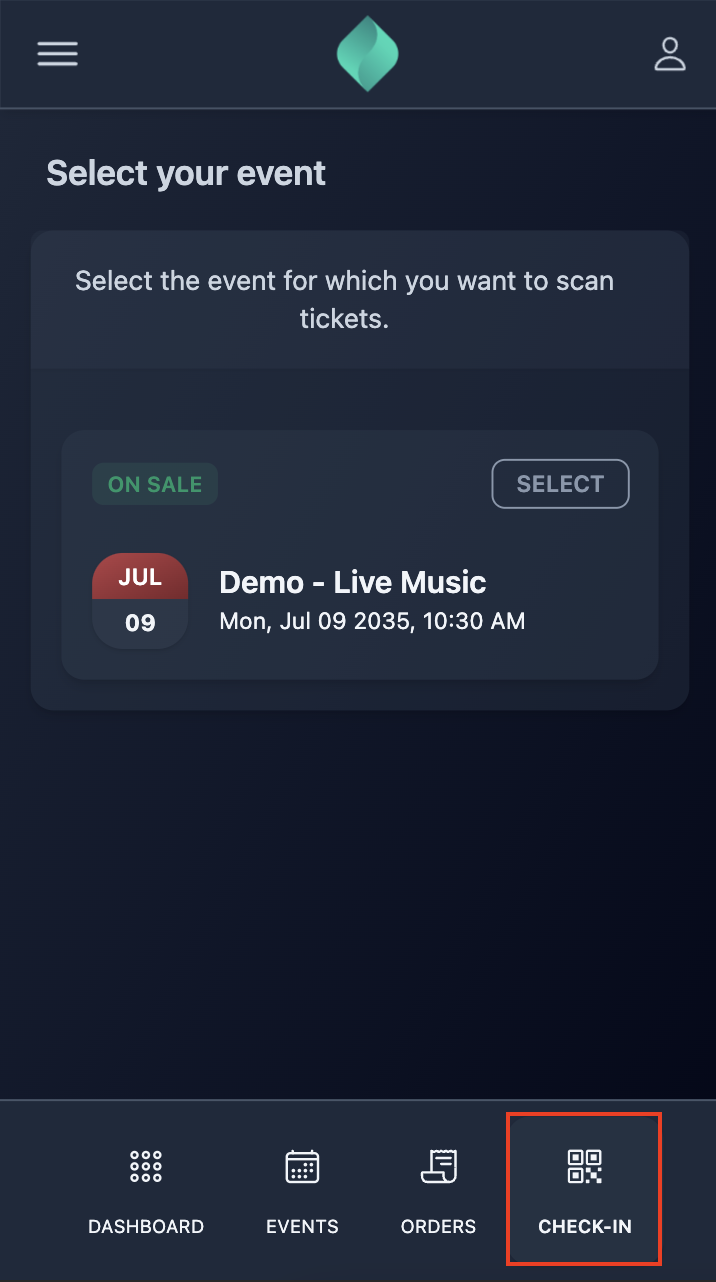
Step 2
Choose your event from the list of upcoming events, then select the date you wish to begin check-in.
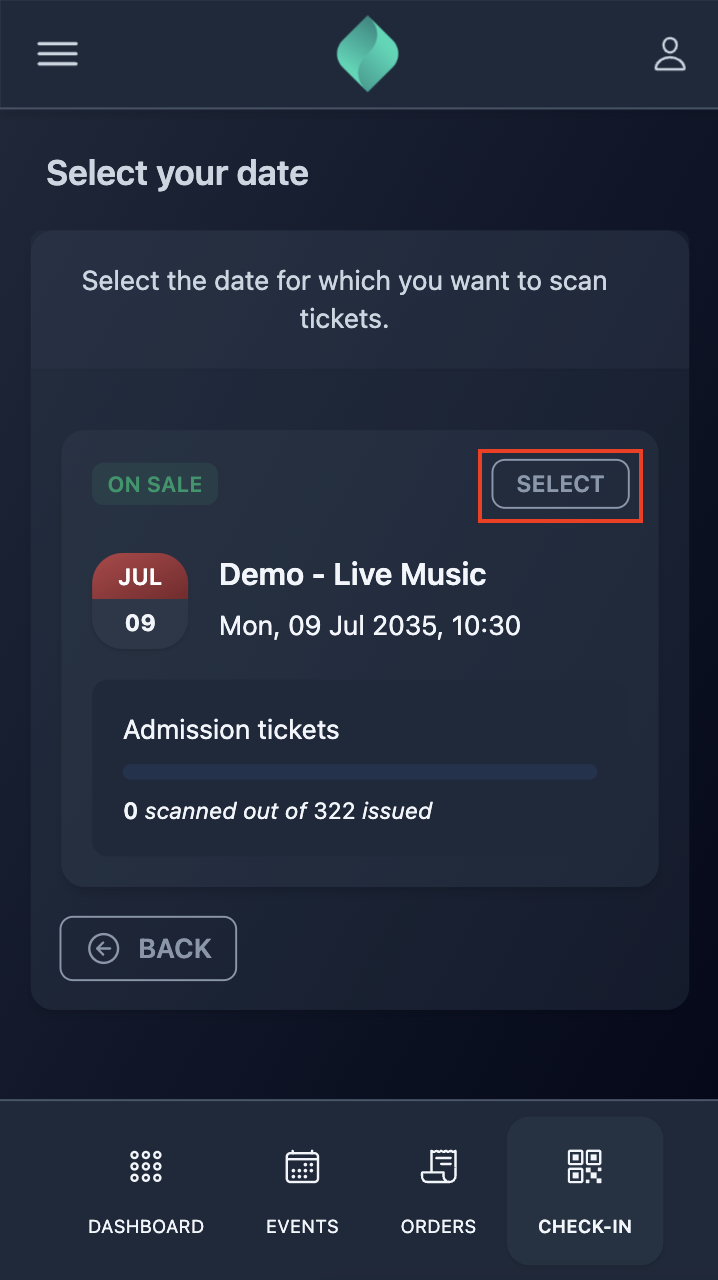
Step 4
When prompted, allow your browser to use your camera.
Step 5
Frame the first QR code and begin your check-in experience.
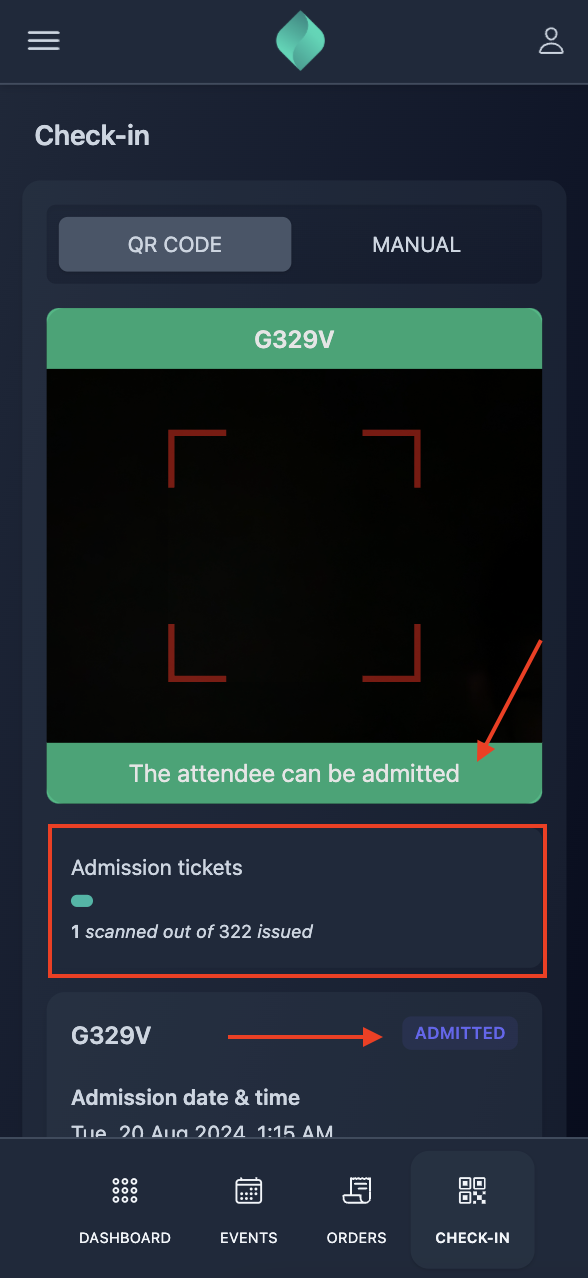
If the QR code is valid :
- the scanner frame will turn green and will start pulsing;
- the "admitted" label will show up;
- the scanned tickets counter will increment.
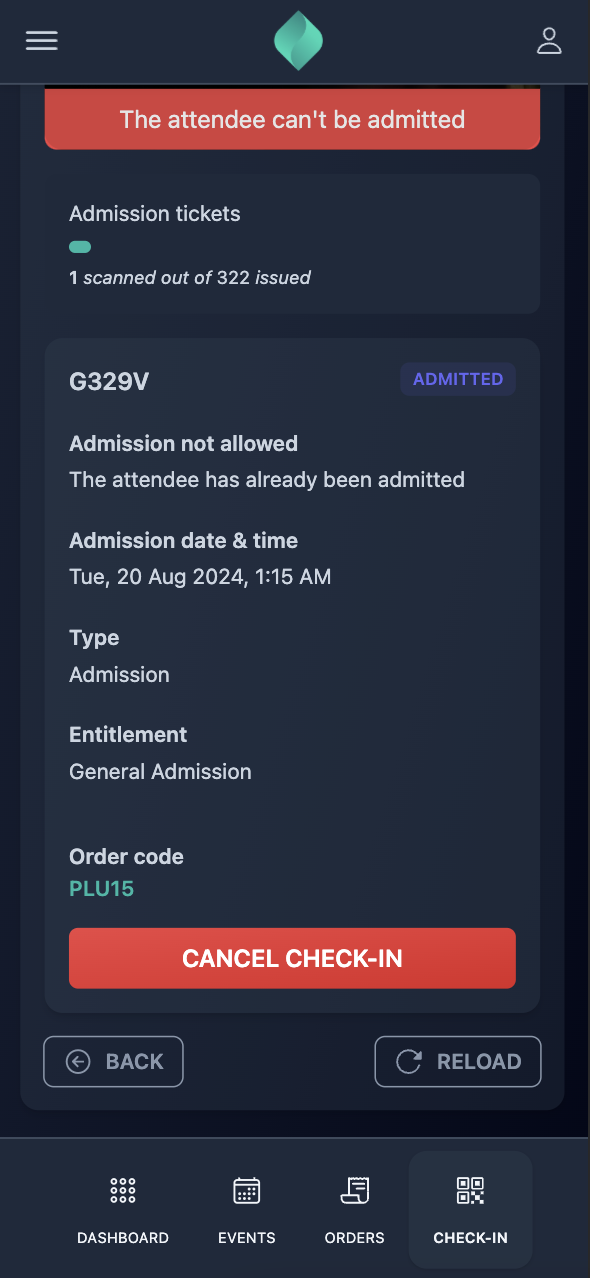
If the QR code is valid :
- the scanner frame will turn red and will start pulsing;
- the reason for the rejection will show up.

Bonus 1: revert check-in
If something goes wrong you can easily cancel the check-in and scan the same QR code later.
Bonus 2: manual check-in
While we generally don’t recommend using manual check-in from a smartphone, it’s available at your fingertips if you need to run a search for any reason.