
📅 How to create an event
Creating an event is quick and easy, requiring just a few simple steps.
Next, click "Create Event" to start the event creation process.
The event will be created as a draft and won’t be visible to the public until you’re ready to share it with your audience. So, no need to worry if you’re unsure about any details, you can easily edit the information later.
Basic Info
Provide the essential details for your event.
Name
Choose a captivating name that truly reflects the essence of your event.
Category
Select the best category for your event.
Currency
Select the currency in which you will accept payments for your tickets.
Date & Time formats
Choose how dates and times will be displayed on your event page. Ensure the format aligns with your audience’s expectations to avoid any confusion.
Timezone
Select the timezone for your event. You can also choose to display the timezone on your event page, which is particularly useful for online events with attendees from around the globe.
Event Type
Select "In Person" if the event takes place at a physical location, such as a venue or a public space. Choose “Online” if the event will occur on the internet. Opt for “To be defined” if you are unsure about the location or online platform where the event will take place.
Description
Provide detailed information to your attendees so they fully understand what they are purchasing. Include relevant keywords to optimize search engine visibility, as your event page description will be indexed by search engines such as Google and Bing.
Click "Next".
Dates & Times
Click "Add date & time".
Specify the start and end date and time of your event.
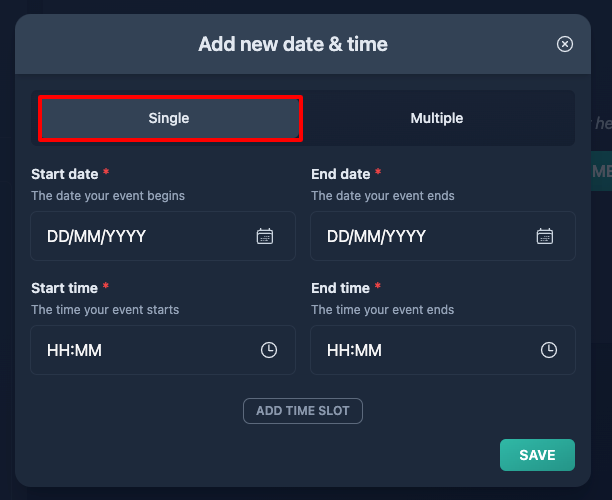
You can also add multiple timeslots for the same day if you wish to, and if the event repeats, you can set up a sequence of dates.
Click "Save", then click "Next".
Ticket Types
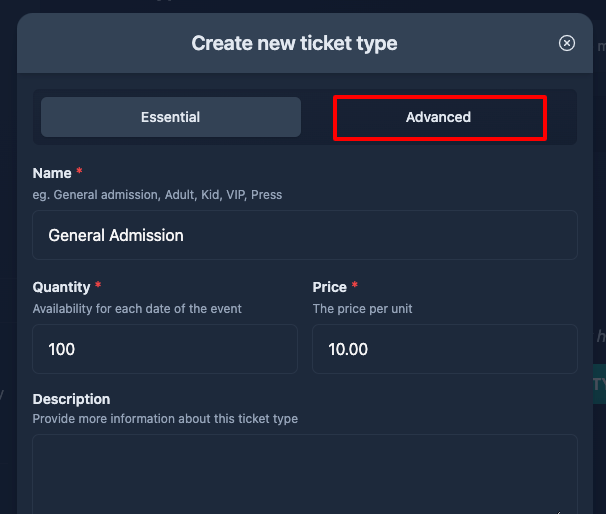
Click "Add ticket type".
Provide the essential details for your ticket type.
Name
Choose a name for your ticket type, it will show up in the checkout process.
Quantity
Enter the available quantity for the ticket type. For recurring events or events with multiple timeslots, this quantity will apply to each date and time. For example, if you enter 100 and have 3 dates, 100 tickets will be available for purchase on each date.
Price
Enter the price for the ticket type. The currency will match the one you set in step 1.
Tax rate
If you have already setup one or more tax rates and your ticket type is not free, you can assign a tax rate to the ticket type.
Tax inclusion
Choosing “price tax included” won’t change the ticket price for the public, but Tixtree will calculate the tax amount for you and include that information in your data exports.
If the ticket price is 10.00 and you assign a 10% tax rate, the final ticket price will be 10.00 but in your export you will find that the item subtotal is 9.00 and the tax amount is 1.00.
Choosing “price tax excluded” will add the tax amount on top of your ticket price. This information will also be included in your data exports.
If the ticket price is 10.00 and you assign a 10% tax rate, the final ticket price will be 11.00 and in your export you will find that the item subtotal is 10.00 and the tax amount is 1.00.
Advanced Options
For more complex setups, open the "advanced" tab, where you’ll find numerous customization opportunities.
Click "Save", then click "Next".
Cover Image
You can enhance your event page with a cover image that captures and conveys the vibe of your event.
Click "Choose file".
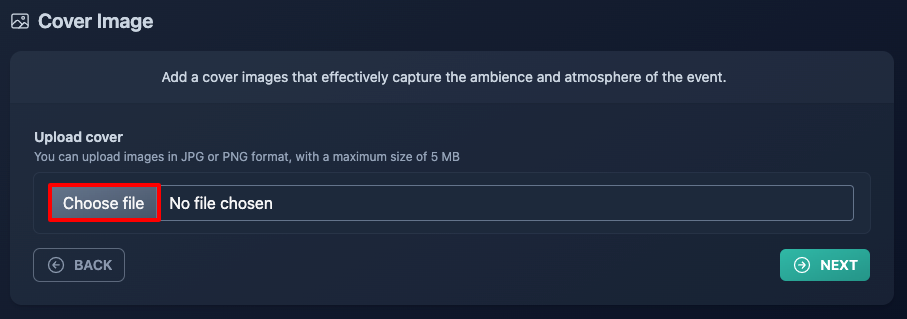
Browse your folders and double click on the image you would like to upload.
The image preview will show up, you can resize it if you wish.
Click "Upload", then click "Next".
Theme
You can now customize your event page with our powerful theme editor.
You can slightly change the default theme or compose your own from scratch, it's totally up to you.
We have dedicated a full page to our theme editor where you can learn everything about it.
Click "Next".
Publish
You have just landed on your event overview, your future head quarter.
If your organization is already connected to your favourite payment processor you just need to click on the "Publish" button and your event will be available to the general public, ready to sell out!
